מדריך בקר נגן מלמעלה למטה עבור Unity
אנשים רבים מכירים ז'אנרים של משחקים כמו FPS (יורה באדם ראשון) ו-RTS (אסטרטגיית זמן אמת), אבל יש גם משחקים רבים שאינם נכנסים רק לקטגוריה אחת ספציפית. משחק אחד כזה הוא Top-Down Shooter.
Top-Down Shooter הוא משחק שבו השחקן נשלט מנקודת מבט מלמעלה.
דוגמאות ליריות מלמעלה למטה הן Hotline Miami, Hotline Miami 2, Original Grand Theft Auto וכו'.
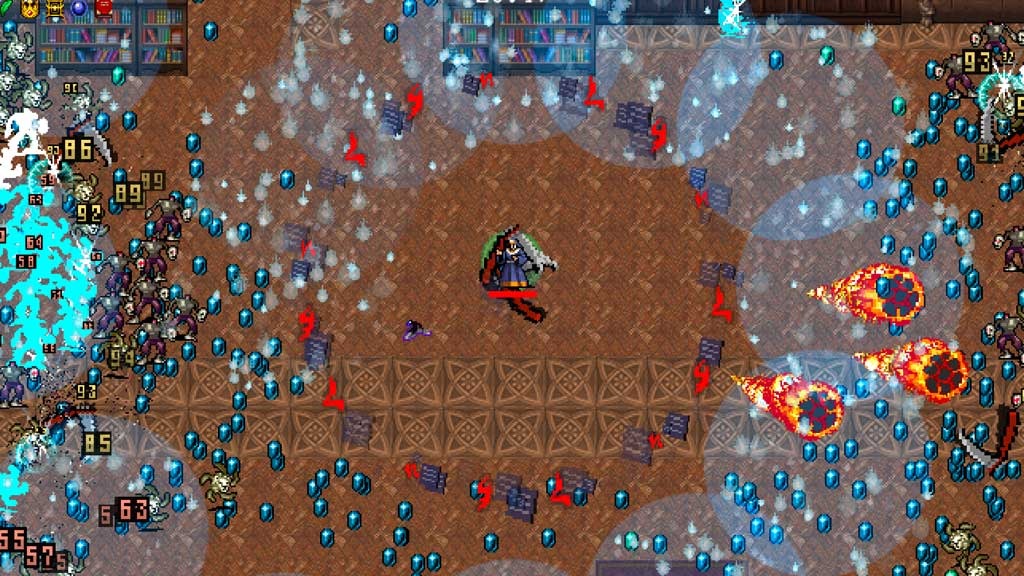
כדי ליצור בקר תווים מלמעלה למטה ב-Unity, בצע את השלבים הבאים.
שלב 1: צור את הסקריפטים
עבור הדרכה זו, נצטרך רק סקריפט אחד.
- צור סקריפט חדש, שם לו SC_TopDownController, הסר ממנו הכל והדבק בתוכו את הקוד למטה:
SC_TopDownController.cs
using UnityEngine;

[RequireComponent(typeof(Rigidbody))]
[RequireComponent(typeof(CapsuleCollider))]

public class SC_TopDownController : MonoBehaviour
{
    //Player Camera variables
    public enum CameraDirection { x, z }
    public CameraDirection cameraDirection = CameraDirection.x;
    public float cameraHeight = 20f;
    public float cameraDistance = 7f;
    public Camera playerCamera;
    public GameObject targetIndicatorPrefab;
    //Player Controller variables
    public float speed = 5.0f;
    public float gravity = 14.0f;
    public float maxVelocityChange = 10.0f;
    public bool canJump = true;
    public float jumpHeight = 2.0f;
    //Private variables
    bool grounded = false;
    Rigidbody r;
    GameObject targetObject;
    //Mouse cursor Camera offset effect
    Vector2 playerPosOnScreen;
    Vector2 cursorPosition;
    Vector2 offsetVector;
    //Plane that represents imaginary floor that will be used to calculate Aim target position
    Plane surfacePlane = new Plane();

    void Awake()
    {
        r = GetComponent<Rigidbody>();
        r.freezeRotation = true;
        r.useGravity = false;

        //Instantiate aim target prefab
        if (targetIndicatorPrefab)
        {
            targetObject = Instantiate(targetIndicatorPrefab, Vector3.zero, Quaternion.identity) as GameObject;
        }

        //Hide the cursor
        Cursor.visible = false;
    }

    void FixedUpdate()
    {
        //Setup camera offset
        Vector3 cameraOffset = Vector3.zero;
        if (cameraDirection == CameraDirection.x)
        {
            cameraOffset = new Vector3(cameraDistance, cameraHeight, 0);
        }
        else if (cameraDirection == CameraDirection.z)
        {
            cameraOffset = new Vector3(0, cameraHeight, cameraDistance);
        }

        if (grounded)
        {
            Vector3 targetVelocity = Vector3.zero;
            // Calculate how fast we should be moving
            if (cameraDirection == CameraDirection.x)
            {
                targetVelocity = new Vector3(Input.GetAxis("Vertical") * (cameraDistance >= 0 ? -1 : 1), 0, Input.GetAxis("Horizontal") * (cameraDistance >= 0 ? 1 : -1));
            }
            else if (cameraDirection == CameraDirection.z)
            {
                targetVelocity = new Vector3(Input.GetAxis("Horizontal") * (cameraDistance >= 0 ? -1 : 1), 0, Input.GetAxis("Vertical") * (cameraDistance >= 0 ? -1 : 1));
            }
            targetVelocity *= speed;

            // Apply a force that attempts to reach our target velocity
            Vector3 velocity = r.velocity;
            Vector3 velocityChange = (targetVelocity - velocity);
            velocityChange.x = Mathf.Clamp(velocityChange.x, -maxVelocityChange, maxVelocityChange);
            velocityChange.z = Mathf.Clamp(velocityChange.z, -maxVelocityChange, maxVelocityChange);
            velocityChange.y = 0;
            r.AddForce(velocityChange, ForceMode.VelocityChange);

            // Jump
            if (canJump && Input.GetButton("Jump"))
            {
                r.velocity = new Vector3(velocity.x, CalculateJumpVerticalSpeed(), velocity.z);
            }
        }

        // We apply gravity manually for more tuning control
        r.AddForce(new Vector3(0, -gravity * r.mass, 0));

        grounded = false;

        //Mouse cursor offset effect
        playerPosOnScreen = playerCamera.WorldToViewportPoint(transform.position);
        cursorPosition = playerCamera.ScreenToViewportPoint(Input.mousePosition);
        offsetVector = cursorPosition - playerPosOnScreen;

        //Camera follow
        playerCamera.transform.position = Vector3.Lerp(playerCamera.transform.position, transform.position + cameraOffset, Time.deltaTime * 7.4f);
        playerCamera.transform.LookAt(transform.position + new Vector3(-offsetVector.y * 2, 0, offsetVector.x * 2));

        //Aim target position and rotation
        targetObject.transform.position = GetAimTargetPos();
        targetObject.transform.LookAt(new Vector3(transform.position.x, targetObject.transform.position.y, transform.position.z));

        //Player rotation
        transform.LookAt(new Vector3(targetObject.transform.position.x, transform.position.y, targetObject.transform.position.z));
    }

    Vector3 GetAimTargetPos()
    {
        //Update surface plane
        surfacePlane.SetNormalAndPosition(Vector3.up, transform.position);

        //Create a ray from the Mouse click position
        Ray ray = playerCamera.ScreenPointToRay(Input.mousePosition);

        //Initialise the enter variable
        float enter = 0.0f;

        if (surfacePlane.Raycast(ray, out enter))
        {
            //Get the point that is clicked
            Vector3 hitPoint = ray.GetPoint(enter);

            //Move your cube GameObject to the point where you clicked
            return hitPoint;
        }

        //No raycast hit, hide the aim target by moving it far away
        return new Vector3(-5000, -5000, -5000);
    }

    void OnCollisionStay()
    {
        grounded = true;
    }

    float CalculateJumpVerticalSpeed()
    {
        // From the jump height and gravity we deduce the upwards speed
        // for the character to reach at the apex.
        return Mathf.Sqrt(2 * jumpHeight * gravity);
    }
}![]()
שלב 2: צור את ה-Shader
הדרכה זו דורשת גם הצללה מותאמת אישית, הדרושה כדי להפוך את מטרת המטרה לשכב את שאר האובייקטים (תמיד למעלה).
- לחץ לחיצה ימנית על תצוגת הפרויקט -> צור -> Shader -> Standart Surface Shader
- תן שם לצללית "Cursor"
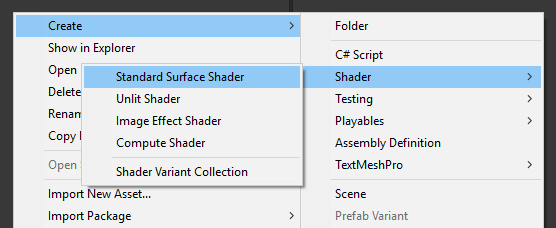
- פתח את הצללה, הסר את כל מה שבתוכו ואז הדבק את הקוד למטה:
Cursor.shader
Shader "Custom/FX/Cursor" {
	Properties {
		_MainTex ("Base", 2D) = "white" {}
	}

	CGINCLUDE

		#include "UnityCG.cginc"

		sampler2D _MainTex;

		half4 _MainTex_ST;

		struct v2f {
			half4 pos : SV_POSITION;
			half2 uv : TEXCOORD0;
		};

		v2f vert(appdata_full v) {
			v2f o;

			o.pos = UnityObjectToClipPos (v.vertex);
			o.uv.xy = TRANSFORM_TEX(v.texcoord, _MainTex);

			return o;
		}

		fixed4 frag( v2f i ) : COLOR {
			return tex2D (_MainTex, i.uv.xy);
		}

	ENDCG

	SubShader {
		Tags { "RenderType" = "Transparent" "Queue" = "Transparent+100"}
		Cull Off
		Lighting Off
		ZWrite Off
		ZTest Always
		Fog { Mode Off }
		Blend SrcAlpha OneMinusSrcAlpha

	Pass {

		CGPROGRAM

		#pragma vertex vert
		#pragma fragment frag
		#pragma fragmentoption ARB_precision_hint_fastest

		ENDCG

		}

	}
	FallBack Off
}![]()
שלב 3: הגדר את בקר התווים מלמעלה למטה
בואו נגדיר בקר תווים מלמעלה למטה:
- צור GameObject חדש וקרא לו "Player"
- צור קובייה חדשה וקנה קנה מידה (במקרה שלי קנה המידה הוא (1, 2, 1))
- צור קובייה שנייה, קנה קנה מידה קטן יותר והזז אותה לאזור עליון (זה פשוט כדי לדעת לאיזה כיוון השחקן מסתכל)
- הזז את שתי הקוביות בתוך האובייקט "Player" והסר את רכיבי BoxCollider שלהם
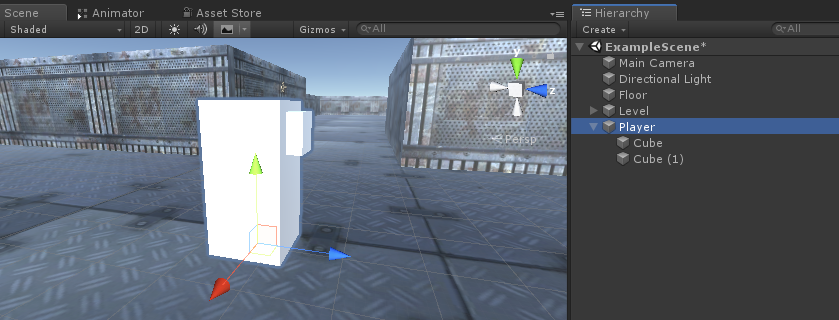
כעת, לפני שנמשיך הלאה, הבה ניצור את ה-Aim target prefabrary:
- צור GameObject חדש וקרא לו "AimTarget"
- צור Quad חדש (GameObject -> 3D Object -> Quad) והזז אותו בתוך האובייקט "AimTarget"
- הקצה את הטקסטורה למטה ל-Quad ושנה את ה-Material Shader ל 'Custom/FX/Cursor'
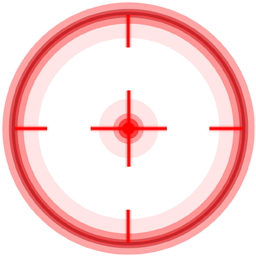
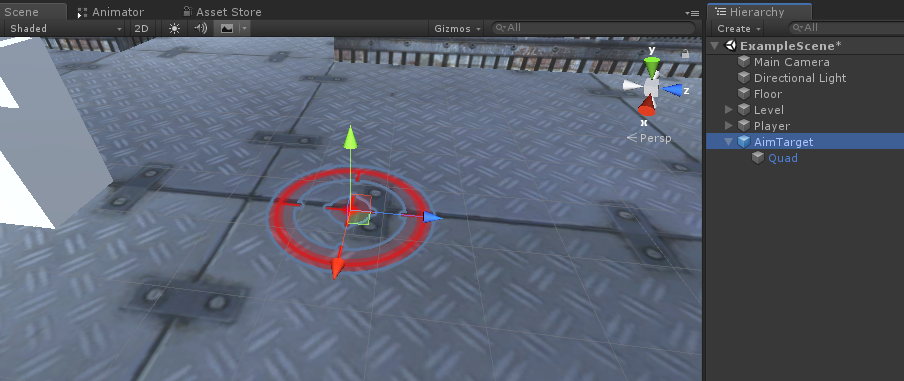
- שמור את "AimTarget" ל-Prefab והסר אותו מהסצנה
![]()
חזרה למופע הנגן:
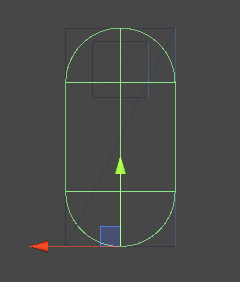
- צרף סקריפט SC_TopDownController לאובייקט "Player" (תבחין שהוא הוסיף כמה רכיבים נוספים כגון Rigidbody ו-CapsuleCollider)
- קנה קנה מידה של CapsuleCollider עד שהוא מתאים לדגם הנגן (במקרה שלי הגובה מוגדר ל-2 והמרכז מוגדר ל- (0, 1, 0)
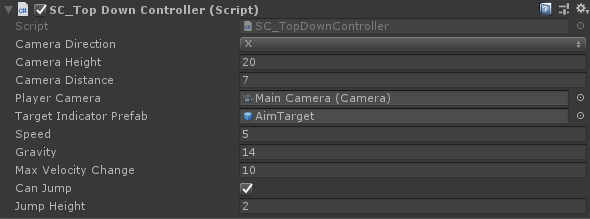
- ולבסוף, הקצה את המשתנים "Player Camera" ו-"Target Indicator Prefab" ב-SC_TopDownController
מופע הנגן מוכן כעת, בואו נבדוק אותו:
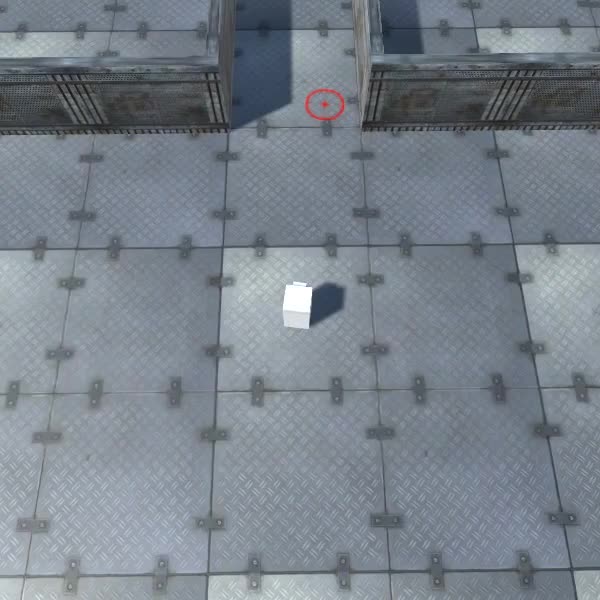
הכל עובד כמצופה.